PET film may appear clean and glossy, yet its surface can still resist ink, coating, or adhesive. That mismatch is why manufacturers measure wetting tension before production. The phrase “how to test the surface tension of PET films” often refers to a practical wetting test, not a direct measurement of every aspect of surface energy. The distinction matters.
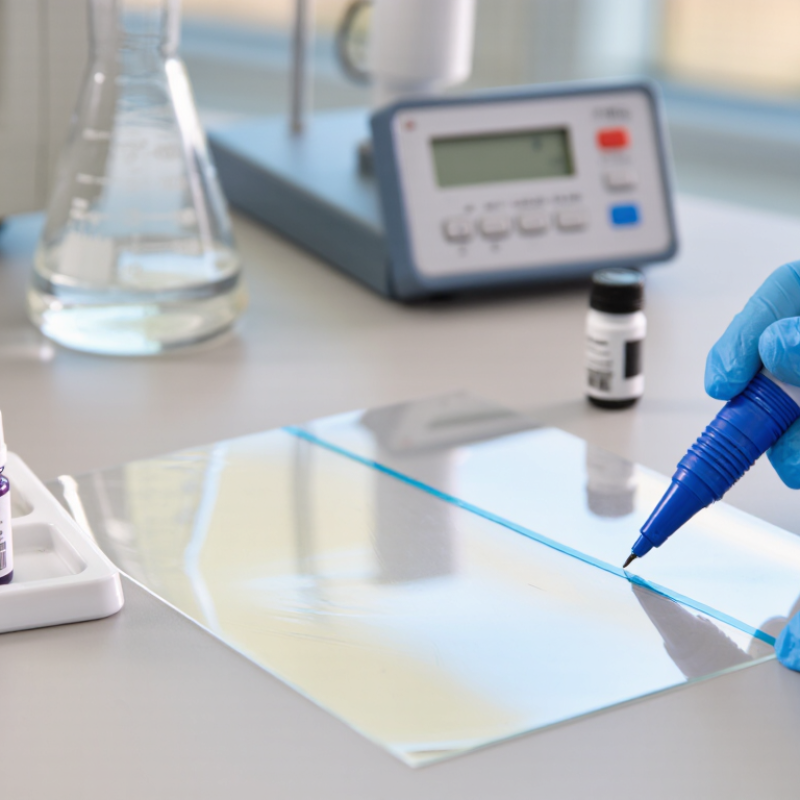
Polymer surface-analysis expert David Briggs’s published work highlights the importance of understanding a material’s surface chemistry. A practical takeaway—not a verified direct quotation—is that a wetting reading describes surface condition, not guaranteed bond strength. For a quick check, use fresh, uncontaminated PET and suitable dyne test solutions. Draw a narrow line, then watch whether it stays continuous or breaks into droplets within the specified observation time. Keep the film flat. Avoid touching the test area.
Record the solution level, film side, test time, and room conditions. Compare results across samples, not just against a single target. ASTM D2578 is a relevant method for assessing wetting tension on plastic film, but follow its current procedure and your supplier’s guidance. Dyne pens are convenient. They are not infallible. Aging, additives, coatings, and handling can change the result, while the test itself can leave residue. A high reading alone does not prove that printing or lamination will succeed. I would treat it as a process clue, then confirm performance with the actual ink, coating, or adhesive. One limitation remains: a quick test can make a complex surface seem simpler than it is.
PET film has a naturally smooth, low-porosity surface, but its ability to accept ink, adhesive, or coating depends on surface condition. In production, operators often discuss “surface tension” when they mean wetting tension, expressed in dynes per centimeter. ISO 8296 specifies a method for measuring wetting tension on plastic film using test liquids. The result helps indicate whether a liquid can spread across the film rather than bead up. Small differences matter.
A dyne test is simple: clean a representative film area, apply test liquid with a swab, and observe whether the line remains continuous for the specified time. The highest liquid level that stays unbroken estimates the film’s wetting tension.
Keep the sample, temperature, and test timing consistent; contamination from fingerprints can skew results. ASTM D2578 covers wetting tension for polyethylene and polypropylene films, so it should not be treated as a PET-specific procedure. Check the applicable method before reporting PET results.
A number alone is not enough. Record the film side, treatment history, and test conditions, then compare results with the coating or printing process requirements. Surface readings can vary across a roll, and a single test may miss that variation.
For routine PET film checks, dyne solutions offer a quick production-floor screen. ASTM D2578-23 describes wetting-tension testing for treated plastic films, including PET. Apply a small stroke to a clean, flat area, then watch whether it forms a continuous film or breaks into beads. Many dyne kits use 2 mN/m intervals, so results are approximate, not a precise surface-energy measurement. Keep the liquid, applicator, and film consistent. A dusty sample can mislead.
For tighter process control, use contact-angle measurement and record the liquid, drop size, temperature, and reading time. A goniometer measures the angle where a water drop meets the film; a smaller angle generally indicates better wetting. ISO 8296:2003 also specifies wetting-tension testing for plastic films, providing a useful reference for controlled comparisons.
Do not treat 38 mN/m as a universal pass mark: the required value depends on ink, adhesive, coating, and line conditions.
Compare treated and untreated samples, and test both sides if treatment may differ. I would still verify borderline dyne results with contact-angle readings; the faster method is not always the clearest.
Before testing, let the PET film and equipment reach the same room temperature. Keep the film flat on a clean, dry surface. Dust, fingerprints, and moisture can change how test liquid spreads. Handle samples by the edges. Small details matter.
Mark a representative area away from cut edges, folds, and visible scratches. If the film has a treated side, identify it before testing; surface treatment can differ between sides. Use clean gloves and avoid wiping the test area unless your procedure specifies a suitable cleaning method. Cleaning can alter the surface.
Check that the test pens or liquids are within their stated shelf life, and keep their applicators clean. Follow the method’s specified contact time and reading criteria. A liquid that forms a continuous line is interpreted differently from one that quickly beads, but timing matters. Test several locations, since roll-to-roll variation is possible. Record the film side, room conditions, test fluid level, and observations. Be consistent. A quick visual judgment can be subjective, especially when the line is faint, so note uncertainty rather than forcing a precise result.
| Stage | Preparation or Test Item | Recommended Practice | Purpose or Record |
|---|---|---|---|
| Sample selection | Identify the film side and sampling location | Record the treated side, roll or sample identifier, and sampling position. Avoid visibly scratched, creased, or contaminated areas. | Ensures results can be linked to the correct film surface and location. |
| Sample preparation | Cut test pieces | Cut flat pieces large enough for the selected test method. Handle by the edges and avoid touching the test area. | Reduces contamination and provides a usable, even testing surface. |
| Conditioning | Allow the film to stabilize | Bring samples and testing materials to the laboratory environment before testing. Record temperature and relative humidity. | Environmental conditions can affect wetting behavior and repeatability. |
| Surface cleaning | Keep the test area free of residue | Do not wipe with solvents or cleaners unless the test procedure specifically requires it; cleaning may change the surface condition. | Tests the film as received rather than an altered surface. |
| Equipment check | Dyne test inks or solutions | Use fresh, in-date test materials with clearly stated surface-tension values. Keep containers closed when not in use. | Old or contaminated liquids can give misleading wetting results. |
| Equipment check | Applicator and timer | Prepare a clean applicator or swab and a timer. Use a separate applicator for each test liquid. | Prevents carryover between different test values and supports consistent timing. |
| Test procedure | Apply the test liquid | Draw a thin, even line across a representative area without excessive pressure or repeated brushing. | Creates a comparable wetting observation across test points. |
| Test observation | Observe film continuity | Follow the test-kit instructions for the observation interval. A line that remains continuous indicates wetting at that test level; beading or breakup indicates insufficient wetting. | Identifies the approximate surface-tension level according to the chosen method. |
| Result determination | Bracket the transition | Test nearby values on a fresh area to find the highest level that wets continuously under the specified procedure. | Report the result as an approximate dyne level, not as a direct measurement of surface energy. |
| Repeatability | Test multiple locations | Repeat at several representative positions and record each observation rather than relying on a single test point. | Reveals variation across the sample or roll. |
| Reporting | Document test conditions | Record the method, test-liquid values, treated side, sample location, environmental conditions, observation time, and results. | Supports traceability and comparison between samples. |
| Safety and limitations | Handle test liquids appropriately | Follow the product safety instructions and dispose of used materials properly. Treat dyne-test results as method-dependent screening values. | Results can vary with liquid formulation, application technique, and observation time; use a consistent procedure for comparisons. |
Dyne test solutions offer a quick check of whether PET film can accept inks, coatings, or adhesives. The method estimates wetting tension in millinewtons per metre (mN/m). ISO 8296:2003 describes a film wetting-tension test using calibrated liquids, commonly spanning 25 to 60 mN/m. A higher reading generally indicates better wetting, but it does not guarantee strong adhesion.
Place a clean film sample on a flat surface. Apply a short line of test solution with a clean cotton swab, then watch it closely. If the line stays continuous for about two seconds, the film’s surface meets or exceeds that solution’s rating. If it beads or breaks quickly, test a lower rating. Use fresh liquid and separate swabs to avoid contamination. Small details matter.
For example, compare readings across the web and near the roll edges; treatment can vary. Record the film side, test location, temperature, and elapsed time. Dyne solutions can evaporate, and fingerprints may distort results. ASTM D2578 addresses wetting tension testing for polyethylene and polypropylene films, so PET users should treat it as a useful reference, not a PET-specific guarantee. I would retest after storage, too. A passing result is only a snapshot, and the correct level depends on the converting process.
How to Test the Surface Tension of PET Film?
Interpreting Results and Avoiding Common Testing Errors
A dyne-test result is a practical guide, not a guarantee of successful bonding. If a test liquid forms a continuous line for the specified time, the film likely meets that liquid’s surface-tension level. If it beads or breaks apart, the surface may be less receptive to ink, coating, or adhesive. Compare the result with the process requirement; there is no single value that suits every application. Tiny details matter.
Keep the PET film clean, dry, and flat. Fingerprints, dust, and handling residue can change the result, even when the film looks spotless. Use fresh test liquid and follow its stated contact time. A line that looks stable for a moment may still retract seconds later. Test several spots, including areas near the edges, and record the readings. One inconsistent spot deserves a closer look, not an instant conclusion.
Temperature, humidity, storage, and film treatment can all affect readings. Avoid pressing the applicator hard or drawing the line repeatedly over the same patch. That is an easy mistake to make when results seem unclear. Check the test liquid’s condition and expiration guidance, and compare measurements under consistent conditions. If readings vary widely, pause and inspect the setup before adjusting production. I would not trust one hurried measurement, even if it gives the number you hoped for.
It indicates how readily a liquid spreads across the film. Better wetting may help ink, coatings, or adhesives cover the surface, but it does not guarantee strong bonding.
Clean and flatten a representative film sample. Apply a small stroke of fresh test liquid, then check whether it stays continuous for the stated time. Keep the timing consistent.
It suggests the film meets that liquid’s wetting-tension level. Beading or a line that breaks apart suggests poorer wetting. It is only a guide.
Not exactly. Many test kits use intervals of about 2 mN/m, so readings are approximate. For closer process control, consider contact-angle measurements.
A small water drop is placed on the film, and a goniometer measures its angle. A smaller angle generally indicates better wetting. Record the drop size and reading time.
No. The suitable level depends on the ink, adhesive, coating, and production conditions. Compare results with the actual process requirements, not a universal pass mark.
Fingerprints, dust, moisture, old test liquid, and inconsistent temperature can affect readings. Avoid pressing hard or testing repeatedly on the same patch. Small details matter.
Check several spots, including areas near the roll edges, and test both sides if treatment may differ. Record the conditions and film side. One hurried reading can mislead.
This guide explains how to test the surface tension of PET films and why the measurement matters for processes such as printing, coating, and bonding. Surface tension indicates how readily a liquid can wet the film, helping assess whether its surface is suitable for the intended application. The article outlines how to select an appropriate testing approach, prepare a clean PET sample, and check that the testing tools and dyne solutions are in good condition.
It then describes applying dyne test solutions to the film and observing how the liquid behaves within the specified testing interval. The results can help estimate the film’s surface energy and determine whether further surface treatment may be needed. To improve consistency, the guide also highlights common sources of error, including contamination, uneven application, incorrect timing, and poor storage of test solutions.

Benchmark Plastic